Archive for September, 2010

29
Sep
10

Reputation Management Carrot Vanilla Muffins

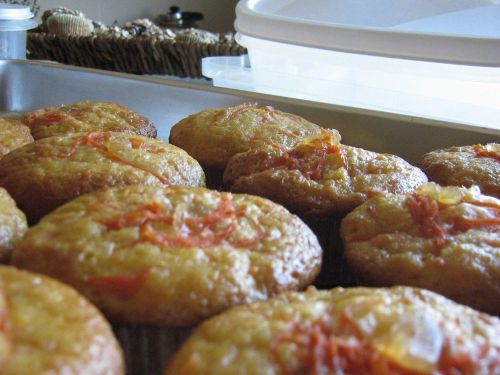
Normally I like to have a photo to accompany the recipe, but these were gone before I got asked for the recipe, so here it is sans visual aid! I made a ton of muffins last night for Social Media Breakfast Ottawa, at which Dave Jones (@doctorjones) from firm Hill & Knowlton spoke about reputation management. And because baked goods seem to be an excellent diplomatic tool, I’m calling these Reputation Management Carrot Vanilla Muffins. Here you go:

Reputation Management Carrot Vanilla Muffins

Makes about 18 muffins

1 c. vanilla yogurt

4 eggs

1/2 c. canola oil

3 medium scrubbed, grated carrots (about 2 1/2 c.)

2 c. unbleached all-purpose flour

3/4 c. granulated sugar

3/4 c. vanilla-infused granulated sugar (or you could use 3/4 c. granulated sugar and seeds from 1 vanilla bean)

2 tsp. baking soda

a pinch of kosher salt

1/2 tsp. freshly rasped cinnamon (I used a nutmeg rasp for this)

Preheat oven to 375º F. Line 2 standard muffin tins with paper liners.

Combine eggs, yogurt and canola oil in a large bowl. Whisk until well combined.

In a separate bowl, sift together flour, sugar and vanilla sugar, and baking soda. Whisk in salt and cinnamon.

Add the flour mixture to the egg mixture and stir until partially combined. Add the shredded carrots to the batter and stir until batter is just combined and no streaks of flour mixture remain, but do not overmix or you’ll end up with tough muffins.

Scoop batter into muffin cups, filling cups almost to the top. You may not need to use all of the cups. In this case, remove liners from empty cups and partially fill the empty cups with water. Bake for 18 to 22 minutes, or until a tester comes out clean.

*UPDATE* I’ve since made these for another social media breakfast, and have a picture to share!

Img_0956

28
Sep
10

Cupcake Camp Cupcakes!

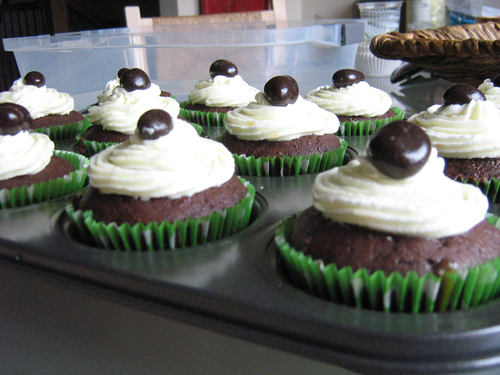
I went to Cupcake Camp this weekend. It was held at City Hall here in Ottawa, and photos from the event can be found here. I entered the Amateur baker category and submitted my cupcakes in the Tastiest Twist on Traditional category. To my sheer and utter delight, they won! So here it is, my recipe for 5-spice chocolate cupcakes filled with tamari caramel and topped with wasabi (yes, wasabi) frosting.

Cupcakes01

5-spice Chocolate Cupcakes

Makes about 2 dozen

2 1/4 c. unbleached all-purpose flour

1 c. unsweetened cocoa powder

2 tsp. baking powder

1 tsp. kosher salt

1 scant tsp. 5-spice powder

1 c. unsalted butter (2 sticks)

1 c. demerara-style brown sugar

1 c. 2 tbsp. white sugar

4 eggs

1 1/2 tsp. pure vanilla extract

1 1/2 c. light coconut milk

Preheat the oven to 325º F and line muffin tins with paper liners, or grease and flour the muffin tins.

In a medium bowl, sift together the flour, cocoa, baking powder, and 5-spice powder. Whisk in the salt to blend.

In a stand mixer on medium speed, cream the butter until light and fluffy. Add the demerara and white sugars and mix to blend. Add the eggs one at a time, incorporating each fully before adding the next.

Whisk the vanilla into the coconut milk. Alternate adding the flour mixture and the coconut milk to the butter mixture, beginning and ending with the flour mixture. Mix only until flour mixture is fully incorporated; do not overmix or cupcakes will get tougher.

Portion the cupcake batter into muffin tins. Bake for 20 to 25 minutes at 325ºF. Check that a tester comes out clean to see if they’re done, but err on the side of underbaking them. If overbaked, they will be too dry.

Tamari Caramel

Makes about 1 1/2 c.

Adapted from Elizabeth Falkner’s Demolition Desserts

1/4 c. water

1/8 tsp. cream of tartar

1 c. granulated sugar

2 tbsp. corn syrup

1 tbsp. unsalted butter

1 c. heavy cream

1 tbsp. tamari

1/2 tsp. reduced-sodium soy sauce

In a heavy-bottomed saucepan, combine water, cream of tartar, corn syrup, and sugar. Mix to moisten sugar. Heat saucepan, covered, on high. Cook until caramel comes to a full rolling boil. Remove the lid and reduce heat to medium-high. Cook until caramel is slightly lighter than the desired colour (I went for a medium red-amber, which gives the sugar a lightly toasted flavour). Remove the pan from the heat.

Add the tablespoon of butter and stir until melted. Slowly and carefully pour in the cream, as there will be a hot column of steam that arises. Place the pan over medium-low heat and stir until smooth and the mixture is slightly bubbly. Remove from heat and stir in tamari and reduced-sodium soy sauce. Decant into a mason jar. Let sit until jar comes to room temperature, then refrigerate until caramel is chilled and thick. Overnight works well.

Add to a piping bag fitted with a filling tip or add to a squeeze bottle. Insert the piping tip into each cupcake and squeeze until it feels as though the cupcake has taken on weight. Continue until all cupcakes are filled.

Wasabi Frosting

I found the buttercream on its own to taste too starchy, and the egg white frosting tasty but too thin to pipe, so I combined the two.

Adapted from Elizabeth Falkner’s Demolition Desserts

Buttercream portion:

1 c. unsalted butter, softened

2-3 tbsp. orange juice

5 c. sifted icing sugar

1/2 tsp. pure vanilla extract

1/2 tsp. wasabi paste

Icing Portion (you’ll only need half of this)

3 egg whites

1/8 tsp. cream of tartar

3/4 c. granulated sugar

2 tbsp. corn syrup

1/2 tsp. pure vanilla extract

1 tsp. wasabi paste

In a stand mixer fitted with the paddle attachment, beat the butter until creamy. Add the orange juice and mix to combine – it may not fully incorporate. Add the icing sugar, one cup at a time. Stop adding icing sugar if the icing becomes too thick for your liking. Add wasabi and vanilla and beat on high until the buttercream is light, fluffy, and blended. Set aside.

In a medium heatproof bowl, combine egg whites, cream of tartar, sugar, and corn syrup. Place over a saucepan of gently simmering water. Using a hand mixer, beat the frosting until glossy white and thickened to the desired consistency. Add the vanilla and wasabi paste and beat just a bit longer. Remove from heat and let cool slightly, about 3 to 5 minutes. Add about half of the icing mixture to the buttercream and beat until thoroughly combined. Add frosting to a piping bag and pipe onto filled cupcakes. If icing is too stiff to pipe, add more of the icing mixture to the buttercream until desired thickness is achieved.
15
Sep
10

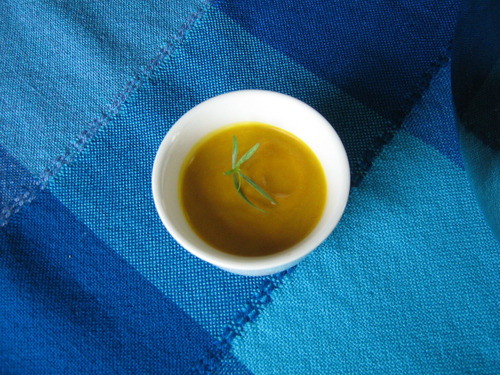
Roasted Carrot and Brie Soup

We had something similar to this dish at Allium a couple years ago, and we were instantly inspired to try to replicate it at home. We’ve been tweaking it here and there since we first tried it, and this recipe comes pretty close.

Carrot_brie_soup

Roasted Carrot and Brie Soup

Makes about 6 servings


4-5 c. carrots, washed and peeled if necessary, chopped into roughly even pieces for roasting

1 or 2 unpeeled cloves garlic (optional, I only do this occasionally)

3 tbsp. butter


1 Vidalia onion, chopped (about 1 1/2 c.)

2 tbsp. butter

4 c. chicken or vegetable stock

about 4 tbsp. brie, rind removed

1/4 c. heavy cream


Preheat the oven to 400ºF. Add 3 tbsp. butter to a roasting pan and place in the oven for about 5 minutes. When butter is melted and starting to turn golden, remove the pan from the oven. Add the carrots, stirring to coat in the melted butter. Try to get them close to a single layer. Add the unpeeled garlic cloves, if using. Roast carrots at 400ºF for about 40 to 50 minutes, until soft in the centre and lightly browned.

In a medium saucepan over medium heat, melt 2 tbsp. butter. When melted, add the chopped onion. Cook, stirring constantly, for about 5 minutes, or until softened and translucent. Add the roasted carrots. Squeeze the garlic from its skin, if using, then add to the carrots and onions. Stir to combine. Add the stock and bring to a boil. Lower the heat to a simmer and cook, covered, for 30 minutes to an hour.

Add soup to blender carafe so carafe is half full. Vent lid for steam and cover lid with a dishtowel to avoid splashes. Puree the soup until smooth. Add cream and brie and blend again. Gradually add remaining soup until all soup is pureed. If it is too thick for your taste, add more stock or some water to help thin it out. Serve garnished with creme fraîche or sour cream and a sprig of tarragon, or simply with a drizzle of good quality olive oil.

Leftovers reheat nicely on a gentle simmer.


14
Sep
10

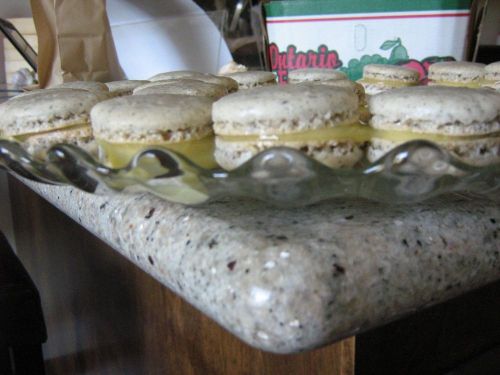
Paris Blend Macarons with Lime Curd

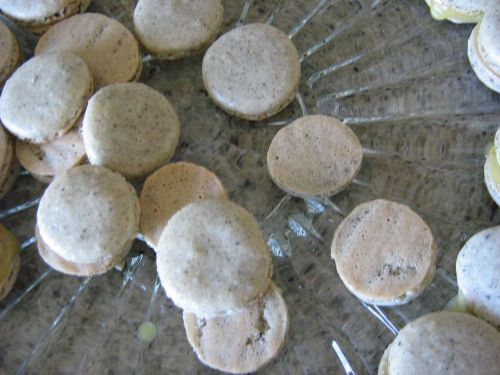
Another dessert I made for the party were these macarons. I tried macarons for the first time last year, and while the flavour was good, they didn’t get the coveted feet typical of macaron shells. This year, I found a tutorial by Not So Humble Pie and it helped considerably. I used Paris Blend tea from Nectar Fine Teas here in Ottawa, which has a slightly chocolate-blueberry flavour mixed with Earl Grey. However, any loose leaf tea will work; you just need to grind it in a spice grinder.

The macarons were fairly tasty to start with, but after they’d aged a few hours they soaked up some of the lime curd and the texture was heaven. However, next time I think I’d do a chocolate or a buttercream filling, so there would be something with a bit more structure in the middle.

Paris Blend Macarons, adapted from Not So Humble Pie

Makes about 2 dozen


100 g egg whites, aged in the refrigerator for 4 days and then at room temperature for about 4 hours

28 g granulated sugar

1/4 tsp cream of tartar

225 g icing sugar

125 g ground almonds


Sift together almonds and icing sugar. My sieve had too fine a mesh for the almond meal, so after all the icing sugar was pushed through, I whisked in whatever didn’t make it through the sieve. Another approach would have been to grind the almonds a bit finer before incorporating.

Whisk together the granulated sugar and cream of tartar. Add egg whites to the bowl of a stand mixer fitted with a whisk. Beat on medium-low until foamy. Continue to beat while slowly adding the granulated sugar mixture. Increase speed to medium-high and beat until you have a meringue with firm, glossy peaks. Do not overbeat to stiff peaks.

Fold in the icing sugar mixture in thirds, using a rubber spatula. Work quickly but try not to deflate the meringue too much. (Some deflation is bound to happen due to the fat in the almonds; just try to minimize it.) When incorporated, scrape the mixture into a piping bag fitted with a medium round tip.

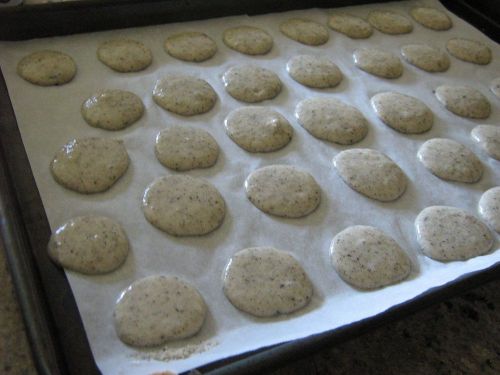
Line 2 cookie sheets with parchment paper. Preheat the oven to 290ºF. Pipe rounds onto the parchment paper. Mine were an average of 1 1/2″ diameter, and I wound up with about 4 dozen shells. Piping a touch of mixture onto the underside of the parchment paper will help to glue it in place as you pipe.

Let the uncooked macaron shells age at room temperature for a minimum of 30 minutes, and up to an hour. Bake one cookie sheet at a time for 15-16 minutes, until shells have risen and developed feet and are easily removed from the parchment. They should look dry. Let cool completely before filling.


The lime curd was made in a double boiler. I’d never made curd this way before, but it’s far more forgiving than cooking it over direct heat. It thickened very gradually, resulting in a silky texture. It’s a very tart curd; next time, I may add a bit more sugar.

Lime Curd

adapted from Christine Cushing via Food Network Canada

Makes more than enough filling for a double batch of macarons


3/4 c. granulated sugar

1/8 tsp. salt

6 egg yolks

zest of one lime

3/4 c. freshly squeezed lime juice

1/4 c. butter cut into several chunks


Combine all ingredients except butter in a medium heatproof nonreactive bowl. Set over a pot of simmering water, making sure the bottom of the bowl does not touch the water. Whisking constantly, cook the mixture until it coats the back of a spoon. Remove the curd from the heat. Whisk in the butter until melted and thoroughly combined. Strain the mixture into another bowl.

Cover the surface of the curd with plastic wrap and chill until cold. Use to fill macaron shells.


13
Sep
10

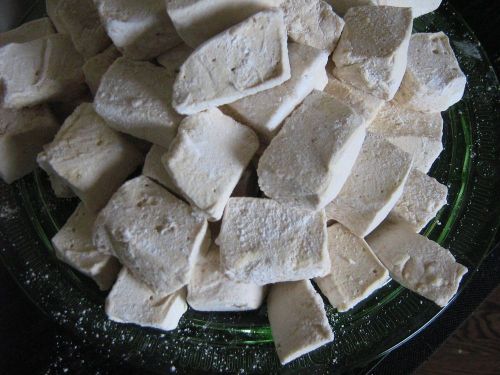
Bellini Marshmallows

Bellinimarshmallows02

Recently, for a black tie function we were hosting, I made these bellini-flavoured marshmallows. They turned out very well, capturing the flavour of both the peaches and the champagne very nicely. However, I cooked the sugar a little too slowly and as a result scorched peach solids from the homemade nectar to the bottom of the pot. (I think that’s what happened, anyway. It was my first venture into fruit-based marshmallows, so that could be a standard by-product. More practice is necessary.) It didn’t affect the flavour adversely, it just took a while to clean the pot.


Bellini Marshmallows

Adapted from Eileen Talanian’s Marshmallows: Homemade Gourmet Treats

3 tbsp unflavoured gelatin, such as Knox

2/3 c. flat champagne, prosecco, or cava (I used Moet)

splash vanilla

1 1/3 c. peach nectar

1 1/4 c. light corn syrup

pinch salt

1 3/4 c. granulated sugar


For the coating:

3/4 c. icing sugar

1/4 c. cornstarch

1/4 tsp. ground szechuan peppercorns, optional


Oil and wipe down a 9″ by 13″ baking pan. Whisk together gelatin, champagne, and vanilla and set aside. Meanwhile, add peach nectar, corn syrup, salt and sugar in a medium heavy-bottomed saucepan. Stir until sugar is moistened, then place over heat. Bring to a boil over medium heat. Cover the pan and let boil for 2 minutes. Remove the lid and attach a candy thermometer to the side of the pan. Increase heat to medium-high and cook until the mixture reaches 248 degrees on the candy thermometer. Remove from heat and whisk in the gelatin mixture until melted.


Carefully pour the mixture into the bowl of a stand mixture with the whisk attachment. Cover the bowl with a towel while beating to avoid splashback of the hot syrup. Bring speed up to high speed and beat the marshmallow for 10 minutes, until opaque and thick. Using an oiled rubber spatula, scrape into the prepared pan. Let cure at room temperature for at least 4 hours. Meanwhile, sift together the coating.


Dust a cutting board with the coating mixture. Using an oiled spatula, remove the cured marshmallows from the pan onto the prepared cutting board. Cut into squares with an oiled pizza cutter. Toss with the coating mixture.


Marshmallows may be stored for up to 2 weeks. And are delicious. This recipe made about 60 marshmallows, cut unevenly.


September 2010
M T W T F S S
 12345
6789101112
13141516171819
20212223242526
27282930